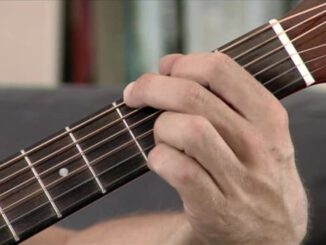
 Most beginners are eager to learn chords, after all that’s what songs are made of right? Unfortunately, learning chords is a heck of a lot harder then it might look in a Youtube video, especially if you’re just starting out. The shapes can be difficult for your fretting hand to make and strumming while switching chords is an entirely different skill of its own.
Instead of rushing off to learn chords I suggest that all beginners first learn the notes on each guitar string. After all, if chords are the things songs are made from, notes are the things chords are made from.
In this short beginner guitar lesson I’m going to share with you the pattern you need to understand not only in music but also on the guitar neck, to know what notes are where and how to find your way around. The concept is all based on some very simple musical theory found on the piano.
Full or Half Steps
Think about what a piano looks like. It has a bunch of white keys all beside each other and a few smaller black keys placed here and there. There is actually some basic logic as to why those keys are placed in the particular places they show up, but first I must explain the concept of a half or whole step.
The space between the white keys on a piano is what’s called a full step, while the space between a white key to one of the black keys is a half step. This translates to the guitar easily. Each fret on your guitar neck is a half step.
So what’s the point of steps?
Glad you asked, full steps are what separates most of the musical notes A through F. There are only two exceptions to this rule. Between B to C there is a half step as well as between E to F. With no surprise these are the notes where the black keys show up on the piano.
Enough about the piano, let’s talk about the guitar neck.
Here’s the breakdown of spacing between each note in terms of steps and frets.
A to B = Whole Step or 2 Frets
B to C = Half step or 1 Fret
C to D = Whole Step or 2 Frets
D to E = Whole Step or 2 Frets
E to F = Half step or 1 Fret
F to G = Whole Step or 2 Frets
G to A = Whole Step or 2 Frets
Armed with this information we can now start on any open string (E, A, D, G, B, E) and move upwards to the next note, and the next and so on following the pattern listed above.
Let’s do an example
Start with your open Low E string, or 6th string if we’re going by numbers. Plucked open of course it plays an E note so what is the next note to be played on this string? It’s an F note, so using our list above we can see that E to F is a half step or 1 fret. Place your first finger on the 1st fret of the 6th string and pluck it, that’s an F.
Let’s do another example
What comes after F is a G note. The spacing between F to G is a whole step or 2 frets. So sliding up the neck to the 3rd fret on the low E or 6th string is a G. Moving up one more we go from G to A (remember musical notes don’t go past G there’s no H note). The spacing again is a whole step so that’s 2 frets again. Sliding up to the 5th fret on the low E string is an A note, which just happens to be the same note as the 5th string below the low E (there’s another pattern to learn there but that’s for another lesson).
Using these patterns you can start from any open string and move upwards to find where the major notes exist. I suggest you watch the lesson video below which will give more examples and a review of what we talked about in this post and then grab your own guitar and give it a try.
Beginner Guitar Lesson – Learning the Notes on Each Guitar String
Interested in more beginner guitar tips? Have you considered trying a guitar lessons dvd? You can get the same great instruction as from a private instructor from the comfort of your own home. Learn to play guitar at home, on your own time line.


Be the first to comment