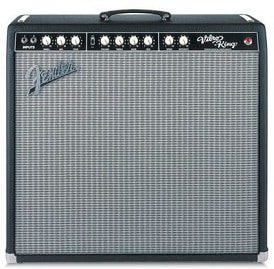
Guitar amps are, no matter how you cut it, black boxes. You may think you have control over them, but when it gets down to it, you can’t really see inside the black box, and even if you could, there aren’t any moving parts. Electricity is largely non-mechanical. Or in other words, magic. And when the magic stops, most people think all they can do is resort to prayer. Or an amp technician.
When your amp isn’t performing up to snuff, there’s still a lot you can do without having an EE degree, or even knowing how to operate test equipment. Here are some holistic approaches—and solutions—you can try yourself, as I did when my tube amp went on the fritz. Warning: Some of the following procedures involve messing around with the components of the amp, so be careful. Electricity can kill you. Proceed at your own risk.
Creeping death
Failure in a tube amp is often creeping and insidious, more like the wearing of the tread in your tires than a light bulb blowing. Because the changes generally occur over time, you can become inured to little degradations in performance. Then one day, maybe after you’ve been away and come back to it, you realize something’s not right. Such was the case with me and my favorite tube amp, my Fender Vibro-King. The following procedures, though, will work on many tube amps.
The symptoms: it hurts when I do this
The Fender Vibro-King is an all-tube amp containing five 12AX7’s, two 6L6 power tubes, and three 10″ Jensen P10R speakers. The amp was definitely underperforming though I really couldn’t be sure why. The manifestations of this poor performance included a distorted sound at a low volume, a generally mushy and ratty/rattly tone, and an overall output that didn’t seem as loud as it once was when the amp was in its prime.
I noticed further that rather than a wholesale volume loss, the amp was plenty loud with the volume knob up to about noon. Beyond that, the amp simply got more distorted, but not appreciably louder. This led me to conclude that while the preamp was pumping more and more voltage through the amp, the power tubes weren’t up to the task.
If I were to take this amp into a shop, the tech would most certainly replace the tubes. Since I know I already need tubes—and this would improve the amp significantly (if not completely)—I had nothing to lose by trying new tubes in the amp to see if that made a difference. So acquiring in advance a matched pair of new 6L6’s wouldn’t be a waste of effort nor money (I’d simply supply the tech with my own parts). And replacing the tubes and hearing an improvement would prove that the tubes were indeed among the problems.
You have to be careful about proper biasing when changing tubes, but a quick swap produced dramatic results. The amp was at once louder overall and cleaner at higher volumes than with the previous tubes.
Speaker shiatsu
With the tubes replaced, I had plenty of volume and high-gain clean tone back, but there was still this problem with the mushy tone. Somehow I divined more through experience as a musician than as a scientist that the problem emanated from the speakers. I had to determine just which speaker (or speakers) was the culprit.
I lightly placed my fingers through the basket and onto the diaphragms themselves. I did this both with the amp off and with a helper playing guitar as I felt the speakers move under my fingertips.
Sure enough, the top speaker felt weird different from the other two.
My next step was disconnecting the lead wires from the tags, or lugs, of the other two speakers in order to listen to just the top speaker in isolation. (Note well that this changes the load on the amplifier and can damage it if you’re not careful. But I was doing this at a low volume and for
just seconds at a time.) Sure enough, the top speaker was buzzy and underpowered compared to the other two. It was the one that was damaged, and its contribution was making the overall tone unfocused.
When in doubt, swap ’em out
As a first response to a poorly performing tube amp, you can’t do better than to swap out the output tubes especially if you can’t remember the last time you changed them. But I also was able to detect a speaker problem without the aid of special tools just by using common sense. Changing the tubes got me through the gig, but knowing why the amp was misbehaving in other ways gave me insight into how speakers contribute to the tone and better prepared me for this problem should it arise in the future.
Conclusion
It’s a fine line to determine what you should monkey with and what you should leave alone when something goes wrong in a tube amp. Amps are much more difficult than guitars, but that doesn’t mean that you should be afraid of your amp, just that you need to take the necessary precautions. If your amp doesn’t work and you find out it’s because of a user-replaceable blown fuse, you’re going to feel pretty foolish if you have to learn this from the tech at the shop. That’s perhaps the simplest example, but even being able to swap out tubes and diagnose problems can help you better understand your amp and even lead you to solutions and that’s sometimes all you need to get you through that last gig before you can pay a visit to the shop.


Be the first to comment