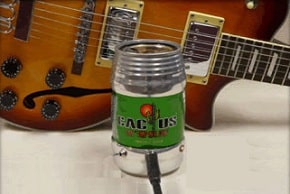
 The first step in building your very own beer can amplifier will be to get an empty can of the beer of your choice. After you have your empty can you will need to remove the bottom of the can. With a little bit of patience and a razor knife, this can be done quite easily.
You will want to be sure that you cut a hole large enough to fit a speaker and the electronics into. The speaker that you use is up to you. Just make sure that it will fit nicely inside of the can. I used an old modem speaker out of an ancient computer I had sitting in my garage. Using epoxy to hold it in place, position the speaker inside of the can somewhere roughly a half of an inch from the top.
After the epoxy has dried and the speaker is securely in place it will then be time to drill holes on the side of the can for the input jack and the potentiometer. The location of the holes is really up to you, but be sure that the holes are the right size for your input jack and pots.
Before your awesome new amp will be able to produce any sound you must build what is known as a Ruby amp. The Ruby amp is a tiny little amplifier. When I say tiny, I mean tiny. The dimensions for it are 4.5 centimeters by 3.1 centimeters. The Ruby amp is very simple to build and install. The schematic and other information on building the Ruby amp can be found at runoffgroove.com/ruby
After installing your Ruby amp into the beer can of your choice and wiring everything up, you will need to find a cover or a cap of some sort for the bottom where you cut the hole. I just measured the bottom of the can and cut a circle out of an old plastic storage tub lid. Rubber cement works well for securing the bottom lid.
Check out the video below of the beer can amplifier in action!


LOL love it,that`s thinking outside of the box.
Coolest thing since beer.